Techniques for Applying Liquid Foundation
By Wander Beauty | Aug 14, 2019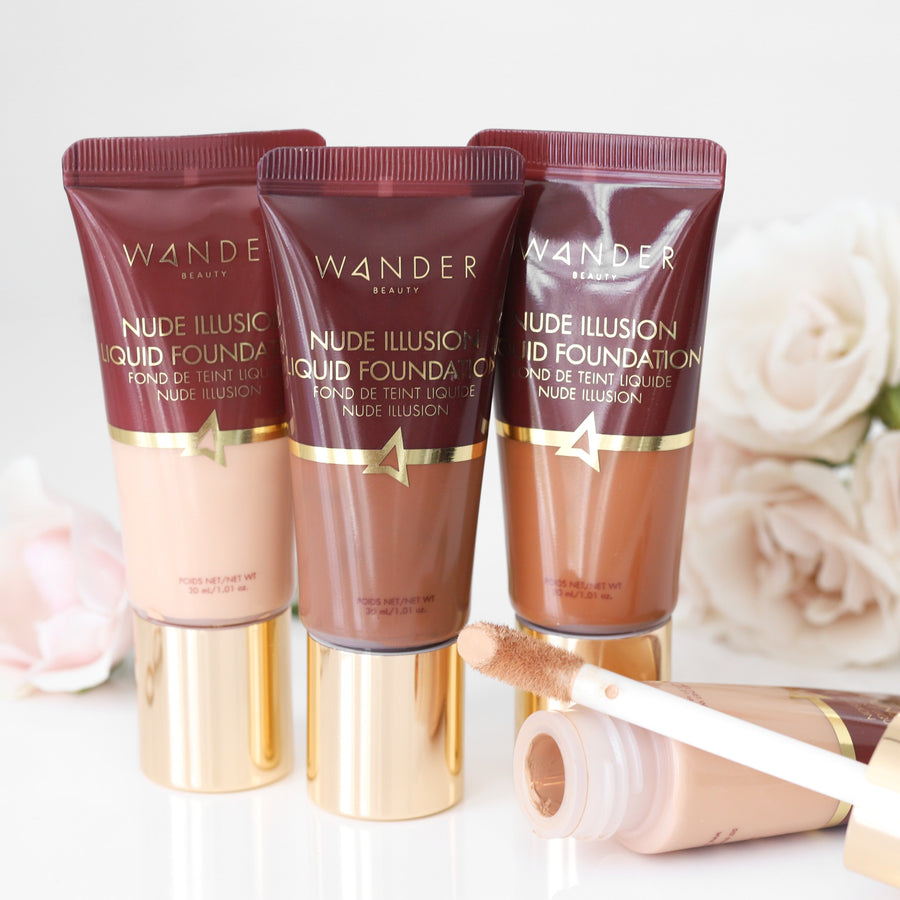
Liquid foundation has been on the market for years now. It has the ability to transform skin, leaving behind a dewy, matte, radiant, or natural finish - depending on your preference - but what really makes these foundations lay so beautifully on the skin? The answer: it’s all in the application.
How To Choose Your Tool
Whether you’re using a classic foundation brush, an innovative sponge or going old school by using your fingers, your foundation will apply differently. Below, we break down which tool you may want to grab next time you’re looking for that flawless finish.
The Classic Brush
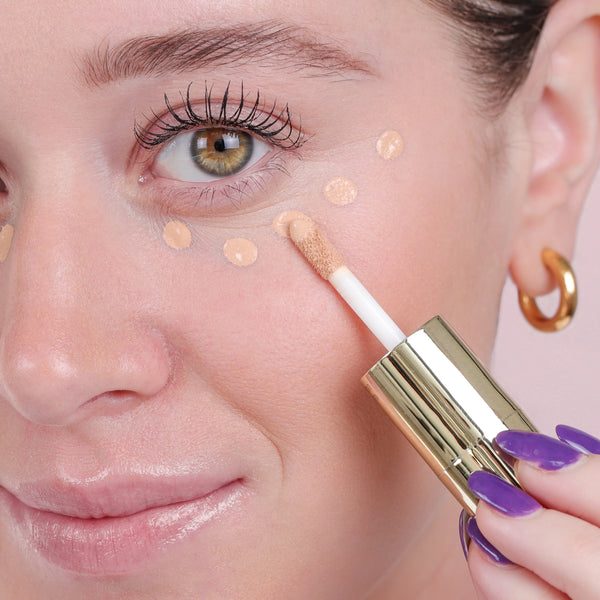
A foundation brush is a cult classic: It’s a safe option for first-time makeup wearers and has been around for years. The important part about picking the perfect foundation brush is to find one that has soft, smooth bristles as well as a tapered shape with more condensed bristles. This shape/density will allow you to “stipple” your liquid foundation into the skin. So what does that mean exactly? It means your going to place the foundation either directly onto the skin or into the brush and gently push the brush into the skin and then pull away from the skin. You’re going to do this at a fairly fast motion until the foundation is perfectly blended, never forgetting ears and blending into the neck.
The coverage that this application allows is a medium to full coverage look. This is perfect for any makeup lover, whether you’re just starting out or are well seasoned.
Another foundation brush that is often seen on the market for liquids is the flat foundation brush. This brush looks similar to a paintbrush and is what you may reach for if you want a full coverage look, or need help detailing in areas such as around the nose or eyes. It is amazing for applying a liquid foundation but can be a little tricky to blend, so you may need to go in with a fluffier brush to blend out. Our tip for using this brush is to use a light hand and use gentle strokes for an even application, starting inwards and moving toward the outer part of the face.
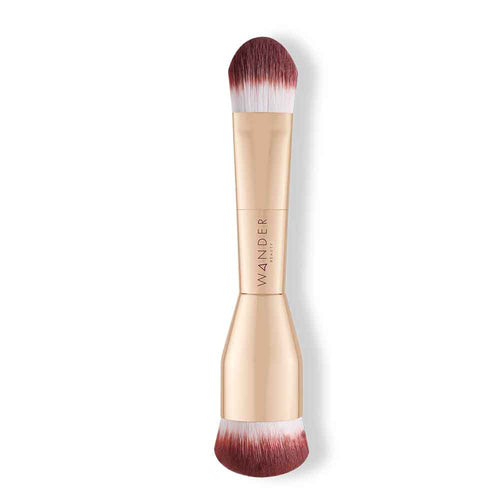
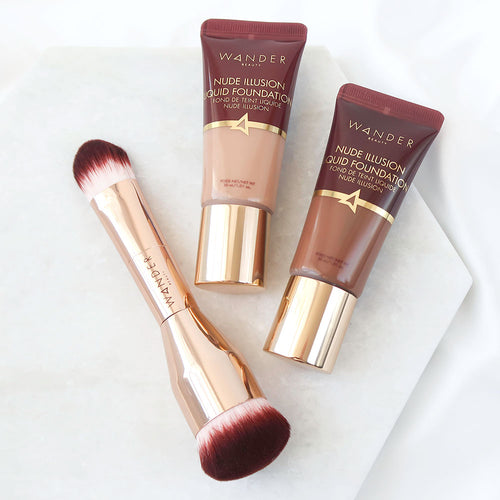
Even better - get yourself a brush that does both, like our Nude Illusion Dual Ended Brush, which combines the two into a single tool.

The Beauty Sponge

Beauty sponges have been the new innovative tool in the beauty world over the last few years. Beauty sponges are all so similar, yet so incredibly different. Most look almost identical to one another but it’s really all about the material they are designed with. When shopping for an ideal beauty sponge, finding one that has a large base to cover a lot of your skin's surface area when blending as well as a pointed end to really get into detail areas like your under eyes, sides of the nose and hairline is best. The perfect way to use a tool as such is to soak the beauty sponge before ringing it out so that it is dampened. Then, bounce it along your skin, again starting from the center of your face and moving outward. This will blend out the foundation by gently pushing the product into the skin and basically melt it into your skin. You don’t want to wipe - you want to pounce. This technique is amazing for a beautiful, airbrushed look that still allows skin to look like skin. Our favorite thing about a beauty sponge here at Team Wander is that you’re able to make the coverage of your foundation as full or as light as you please, just keep layering.
The Tool You Already Own: Fingers
This is a technique that just about anyone can master! When blending out foundation with your fingers, it is essential to only do so after thoroughly washing your hands to ensure you do not transfer any bacteria to your face. Using your fingers is a quick and easy way to blend the foundation to gain a sheer to light coverage. The best liquid foundations to pair this technique with is going to be any foundation that is super blendable and works into the skin seamlessly. This technique is great if you love the look of real skin or are seeking a bit more coverage. Warm product up in your hands before applying to your face, again working from the center outwards.
More Coverage, Please
Liquid foundation can be a makeup lover’s BFF or lead to major cake face, and no one wants that! It is important to take time and slowly build the coverage you are looking for. If one layer of foundation is not enough, feel free to add another, or even better: just target additional application where you need a bit more coverage, but what is important is when and how you do so!
The first thing is patience. After putting your first layer of foundation on making sure it has time to dry onto the skin before adding more. By not waiting, you risk the chance of moving your foundation around your face which can lead to uneven application and streaks.
Next, you never want to add any powder products in between your layering of complexion products. If you are choosing to use a liquid foundation, stick to using liquids and don't even think about touching a powder until you are finished with all of your liquid products! Adding a powder in between your layers of the foundation is a common mistake. Many think this will set their look, when in fact it will do nothing but disrupt the product from melting into your skin, leaving cake in its wake.
Our last tip for perfecting a full coverage look is making sure your skin is prepped and hydrated prior to application. Many struggle with foundation clingy to dry patches on their face. This can be frustrating, so hydrating your skin prior to using your liquid foundation can help one avoid this scenario and have a flawless look.
Make Your Liquid Multitask
One of our favorite things about the liquid foundation is how universal and easy it is to manage and manipulate. Liquid foundation can not only be used for multiple uses but you have the luxury of changing the color, coverage and finish!
Changing the Coverage
Liquid foundation is so amazing for so many reasons. You know that we’re all about multitasking and love a product that can do so! Adding a few drops of your favorite face oil into a foundation can really sheer out the coverage, and add luminosity while customizing the finish. This will give your skin the appearance of a more natural and dewy look, even if the original formula is matte.
Changing the Color
Did you buy your favorite (and often price-y) foundation at the end of Spring but now it is mid-summer and you are not ready to lay out that money again? No worries! The beauty of the liquid foundation and the innovative beauty world today is that you can purchase color altering drops to help make any foundation darker or lighter. This way you can custom your shade without having to buy full bottles of multiple shades for each season.
Changing the Finish
Another tip for changing your liquid foundation is altering the finish the foundation comes with. If you are looking for a dewy look, you can mix any foundation with your favorite face oil and apply or douse your skin in a hydrating facial spray. This is a great way to get that glowy look you are aiming for. In order to get a matte look from a dewy foundation, you can either use a mattifying primer or you can use translucent powder to mattify. Another great tip - are you usually more of a full coverage type but want to dabble in a sheer-er finish once in awhile? Mix your liquid foundation with your favorite moisturizer to customize your coverage and create a DIY tinted moisturizer!
All these tips are just a few of the many reasons as to why liquid foundation is such a universal, multitasking product. So what do you prefer: Liquid or powder? Tell us @wander_beauty!
Techniques for Applying Liquid Foundation

Liquid foundation has been on the market for years now. It has the ability to transform skin, leaving behind a dewy, matte, radiant, or natural finish - depending on your preference - but what really makes these foundations lay so beautifully on the skin? The answer: it’s all in the application.
How To Choose Your Tool
Whether you’re using a classic foundation brush, an innovative sponge or going old school by using your fingers, your foundation will apply differently. Below, we break down which tool you may want to grab next time you’re looking for that flawless finish.
The Classic Brush
A foundation brush is a cult classic: It’s a safe option for first-time makeup wearers and has been around for years. The important part about picking the perfect foundation brush is to find one that has soft, smooth bristles as well as a tapered shape with more condensed bristles. This shape/density will allow you to “stipple” your liquid foundation into the skin. So what does that mean exactly? It means your going to place the foundation either directly onto the skin or into the brush and gently push the brush into the skin and then pull away from the skin. You’re going to do this at a fairly fast motion until the foundation is perfectly blended, never forgetting ears and blending into the neck.
The coverage that this application allows is a medium to full coverage look. This is perfect for any makeup lover, whether you’re just starting out or are well seasoned.
Another foundation brush that is often seen on the market for liquids is the flat foundation brush. This brush looks similar to a paintbrush and is what you may reach for if you want a full coverage look, or need help detailing in areas such as around the nose or eyes. It is amazing for applying a liquid foundation but can be a little tricky to blend, so you may need to go in with a fluffier brush to blend out. Our tip for using this brush is to use a light hand and use gentle strokes for an even application, starting inwards and moving toward the outer part of the face.
Even better - get yourself a brush that does both, like our Nude Illusion Dual Ended Brush, which combines the two into a single tool.
The Beauty Sponge
Beauty sponges have been the new innovative tool in the beauty world over the last few years. Beauty sponges are all so similar, yet so incredibly different. Most look almost identical to one another but it’s really all about the material they are designed with. When shopping for an ideal beauty sponge, finding one that has a large base to cover a lot of your skin's surface area when blending as well as a pointed end to really get into detail areas like your under eyes, sides of the nose and hairline is best. The perfect way to use a tool as such is to soak the beauty sponge before ringing it out so that it is dampened. Then, bounce it along your skin, again starting from the center of your face and moving outward. This will blend out the foundation by gently pushing the product into the skin and basically melt it into your skin. You don’t want to wipe - you want to pounce. This technique is amazing for a beautiful, airbrushed look that still allows skin to look like skin. Our favorite thing about a beauty sponge here at Team Wander is that you’re able to make the coverage of your foundation as full or as light as you please, just keep layering.
The Tool You Already Own: Fingers
This is a technique that just about anyone can master! When blending out foundation with your fingers, it is essential to only do so after thoroughly washing your hands to ensure you do not transfer any bacteria to your face. Using your fingers is a quick and easy way to blend the foundation to gain a sheer to light coverage. The best liquid foundations to pair this technique with is going to be any foundation that is super blendable and works into the skin seamlessly. This technique is great if you love the look of real skin or are seeking a bit more coverage. Warm product up in your hands before applying to your face, again working from the center outwards.
More Coverage, Please
Liquid foundation can be a makeup lover’s BFF or lead to major cake face, and no one wants that! It is important to take time and slowly build the coverage you are looking for. If one layer of foundation is not enough, feel free to add another, or even better: just target additional application where you need a bit more coverage, but what is important is when and how you do so!
The first thing is patience. After putting your first layer of foundation on making sure it has time to dry onto the skin before adding more. By not waiting, you risk the chance of moving your foundation around your face which can lead to uneven application and streaks.
Next, you never want to add any powder products in between your layering of complexion products. If you are choosing to use a liquid foundation, stick to using liquids and don't even think about touching a powder until you are finished with all of your liquid products! Adding a powder in between your layers of the foundation is a common mistake. Many think this will set their look, when in fact it will do nothing but disrupt the product from melting into your skin, leaving cake in its wake.
Our last tip for perfecting a full coverage look is making sure your skin is prepped and hydrated prior to application. Many struggle with foundation clingy to dry patches on their face. This can be frustrating, so hydrating your skin prior to using your liquid foundation can help one avoid this scenario and have a flawless look.
Make Your Liquid Multitask
One of our favorite things about the liquid foundation is how universal and easy it is to manage and manipulate. Liquid foundation can not only be used for multiple uses but you have the luxury of changing the color, coverage and finish!
Changing the Coverage
Liquid foundation is so amazing for so many reasons. You know that we’re all about multitasking and love a product that can do so! Adding a few drops of your favorite face oil into a foundation can really sheer out the coverage, and add luminosity while customizing the finish. This will give your skin the appearance of a more natural and dewy look, even if the original formula is matte.
Changing the Color
Did you buy your favorite (and often price-y) foundation at the end of Spring but now it is mid-summer and you are not ready to lay out that money again? No worries! The beauty of the liquid foundation and the innovative beauty world today is that you can purchase color altering drops to help make any foundation darker or lighter. This way you can custom your shade without having to buy full bottles of multiple shades for each season.
Changing the Finish
Another tip for changing your liquid foundation is altering the finish the foundation comes with. If you are looking for a dewy look, you can mix any foundation with your favorite face oil and apply or douse your skin in a hydrating facial spray. This is a great way to get that glowy look you are aiming for. In order to get a matte look from a dewy foundation, you can either use a mattifying primer or you can use translucent powder to mattify. Another great tip - are you usually more of a full coverage type but want to dabble in a sheer-er finish once in awhile? Mix your liquid foundation with your favorite moisturizer to customize your coverage and create a DIY tinted moisturizer!
All these tips are just a few of the many reasons as to why liquid foundation is such a universal, multitasking product. So what do you prefer: Liquid or powder? Tell us @wander_beauty!