Beauty Basics: How to Apply Blush (and What Formula is Best For You)
By Cassidy Best | Feb 07, 2020
We all want that natural glow. You know, the one that looks like you’ve gotten eight hours of sleep, drank your daily eight glasses of water, and you’ve spent the whole weekend relaxing at the spa. But apart from retiring and hitting the spa weekly, the next best option is our favorite trick: Makeup. And the best way to achieve a natural glowy flush is with blush. If you’re ready to glow, keep reading for our best blush tips and tricks.
How To Prep For Blush
To achieve glowing skin, it all starts with the right prep. Make sure to cleanse and moisturize before you begin applying makeup for a perfected canvas. Then, make sure to prime your skin and apply an even layer of foundation and top with concealer and setting powder before diving in.
50 Shades of Blush
If you’ve tried blush before and it didn’t quite help you achieve the natural glow you were going for, it’s likely that you’ve chosen the wrong shade. Blush should mimic a natural flush, making you look fresh and glowy, not ruddy. Say goodbye to blush that’s “blah” because we’re here to help you pick your perfect shade.
When To Use Pink Blush
A pink-toned blush is going to be best for fair to light skin tones. This will naturally mimic the shade that your cheeks would naturally turn after you finish a workout. To make sure it looks natural, it’s important to focus on the location and the application of the blush.
How to Apply
To mimic natural rosiness, you’ll want to focus on the apples of your cheeks. You can easily find them by grinning slightly and noticing the high points of your cheeks.
Once you’ve located, take a small, dome shaped brush with a dense flattened end and swirl it lightly in the blush of your choice. Then using circular motions, apply to the apples of your cheeks. If you’re using your fingers, lightly press the pigment onto the apples of your cheeks, and tap outwards toward your temples.
The result? A natural flush that says “I just talked to my crush.”
When To Use Peach or Plum Blush
Peach and plum shades are for those with medium to deep skin tones. Though it serves the same purpose as a pink blush in bringing a natural rosiness to the cheeks, you’ll want to take a different application route.
How to Apply
Instead of just adding a pop of color to your cheeks, you’ll want to focus on sculpting the face. To begin, make your best smirk face: Purse your lips and pull them to the side. This should help your cheekbones appear more prominent. Then with an angled brush, start by the ear and make a gently sweeping motion toward the corners of the mouth, but stopping at the beginning of the apples of your cheeks. This will accentuate and define your cheekbones, and you’ll look ready to walk the runway in no time!
Cream Blush vs. Powder Blush
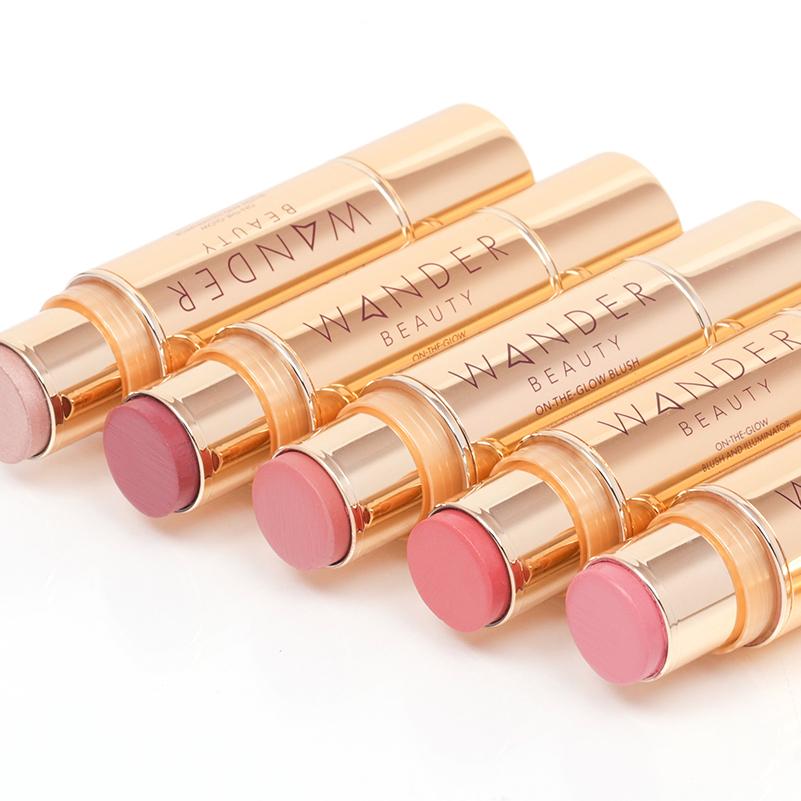
If you’re anything like me, choices stress you out. But this one is simple if you just consider two factors: skin type and preferred look. If you have naturally oily skin, you may want to try a powder blush, like Trip For Two Blush & Bronzer, to absorb a bit of the excess oil. If your skin is naturally dry, try a cream formula like On-the-Glow Blush & Illuminator, to add moisture and sheen.<product>1,2</product>
However, if you have either skin type (or a combination of both!), don’t shy away from either formula completely. You’ll also want to consider what look you’re trying to achieve. For a more sculpted look, try a powder blush. If you’re going for a more natural, “I woke up like this” look, try tapping a cream blush to the apples of your cheeks with your fingers.
See, it’s simple! Give the glow a try, and show us your looks at @wander_beauty.
Beauty Basics: How to Apply Blush (and What Formula is Best For You)

We all want that natural glow. You know, the one that looks like you’ve gotten eight hours of sleep, drank your daily eight glasses of water, and you’ve spent the whole weekend relaxing at the spa. But apart from retiring and hitting the spa weekly, the next best option is our favorite trick: Makeup. And the best way to achieve a natural glowy flush is with blush. If you’re ready to glow, keep reading for our best blush tips and tricks.
How To Prep For Blush
To achieve glowing skin, it all starts with the right prep. Make sure to cleanse and moisturize before you begin applying makeup for a perfected canvas. Then, make sure to prime your skin and apply an even layer of foundation and top with concealer and setting powder before diving in.
50 Shades of Blush
If you’ve tried blush before and it didn’t quite help you achieve the natural glow you were going for, it’s likely that you’ve chosen the wrong shade. Blush should mimic a natural flush, making you look fresh and glowy, not ruddy. Say goodbye to blush that’s “blah” because we’re here to help you pick your perfect shade.
When To Use Pink Blush
A pink-toned blush is going to be best for fair to light skin tones. This will naturally mimic the shade that your cheeks would naturally turn after you finish a workout. To make sure it looks natural, it’s important to focus on the location and the application of the blush.
How to Apply
To mimic natural rosiness, you’ll want to focus on the apples of your cheeks. You can easily find them by grinning slightly and noticing the high points of your cheeks.
Once you’ve located, take a small, dome shaped brush with a dense flattened end and swirl it lightly in the blush of your choice. Then using circular motions, apply to the apples of your cheeks. If you’re using your fingers, lightly press the pigment onto the apples of your cheeks, and tap outwards toward your temples.
The result? A natural flush that says “I just talked to my crush.”
When To Use Peach or Plum Blush
Peach and plum shades are for those with medium to deep skin tones. Though it serves the same purpose as a pink blush in bringing a natural rosiness to the cheeks, you’ll want to take a different application route.
How to Apply
Instead of just adding a pop of color to your cheeks, you’ll want to focus on sculpting the face. To begin, make your best smirk face: Purse your lips and pull them to the side. This should help your cheekbones appear more prominent. Then with an angled brush, start by the ear and make a gently sweeping motion toward the corners of the mouth, but stopping at the beginning of the apples of your cheeks. This will accentuate and define your cheekbones, and you’ll look ready to walk the runway in no time!
Cream Blush vs. Powder Blush
If you’re anything like me, choices stress you out. But this one is simple if you just consider two factors: skin type and preferred look. If you have naturally oily skin, you may want to try a powder blush, like Trip For Two Blush & Bronzer, to absorb a bit of the excess oil. If your skin is naturally dry, try a cream formula like On-the-Glow Blush & Illuminator, to add moisture and sheen.<product>1,2</product>
However, if you have either skin type (or a combination of both!), don’t shy away from either formula completely. You’ll also want to consider what look you’re trying to achieve. For a more sculpted look, try a powder blush. If you’re going for a more natural, “I woke up like this” look, try tapping a cream blush to the apples of your cheeks with your fingers.
See, it’s simple! Give the glow a try, and show us your looks at @wander_beauty.


